Wednesday, January 16, 2019

Goin' Southern with Biscuits and Cornbread

Hello everybody! Time for a quick tale of baking for a huge house party! I hosted a large Christmas party after Christmas where I planned to serve chili because yay, easy, and obviously, I needed biscuits and cornbread to go with the chili. I had planned to make the biscuits and cornbread the night before the party but, due to the unfortunate circumstance of burned fingertips from peeling of 8 pounds of hot tomatoes and browning 16 pounds of meat, that didn't happen. So, looks like a bright and early start to my day!

I decided to go with America's Test Kitchen recipes because I'm always hesitant about serving new recipes to people at parties and I trust that ATK won't lead me astray. I picked a savory drop biscuit (cheddar and chive) that looked like a pretty straightforward recipe. I've never made biscuits before so this was another first for me. Look at me branching out and being adventurous!

I started out by whisking all of the dry ingredients (flour, baking soda AND baking powder, sugar, grated cheddar cheese, chives, and salt) and melting my butter. Then I got to follow the weirdest directions. I had to combine buttermilk and melted (slightly cooled) butter, stirring until the butter formed clumps. Umm, what now? Fortunately, the recipe had the direction "This might look like a mistake but it's one of the secrets to this recipe. The clumps of butter are similar to the bits of cold butter prepared according to the traditional method." So this recipe not only offered me a shortcut but also explained why I was using it. Cool! I'm glad that description existed because that buttermilk sure did get clumpy!

Anyway, once I had clumpy buttermilk, I had to add that to the dry ingredients and stir with a spatula until just combined. Done. And that's it. I had dirtied a bowl, a whisk, and a spatula. Ok, technically the cheese grater too because I was too dumb to buy already grated cheese. But I was done preparing this dough in maybe 10 minutes tops. Oh, I should also mention that I had weighed out all of my ingredients. I basically do this with all test kitchen recipes now.

Batter complete, I scooped out biscuits with my cookie scoop, plopped them on some pans and ta da! About 12 minutes later, they were done. All I had to do was brush the tops with some melted butter for a little extra flavor.


For context for what I'm about to say, I should point out that this was literally the first thing I did in the morning, even before my coffee. So at this point, I let these little beauties cool a bit while I made my coffee and decided to taste one for my breakfast. Yes, I know they're savory and that's not really a breakfast-y thing but I was hungry. I got cozy on my couch with a book to read, my cup of coffee, and a biscuit and OMG, these were so good! I had expected them to be tasty. But I hadn't dreamed that they'd be the best damn biscuit of my life. Crisp on the outside, soft and layered on the inside, amazing flavor from the cheddar and chive. I strongly considered hiding them from people so I could gobble them all myself. As a side note, I didn't warm them up for the party and while they were still delicious, they weren't quite as heavenly. I did warm up the leftovers the next day though. Amazing.

Now that I was done with my biscuit-gasm, it was time to tackle some cornbread!

I had looked over my recipes in advance and was pretty torn about northern style cornbread vs. southern style. I don't particularly know the difference except that the northern style recipe had actual corn and I didn't want that. Plus as an added bonus, I got a chance to bake in my cast iron skillet!

This was actually another super easy recipe. I started by toasting my cornmeal in the oven while I was preheating my cast iron skillet with some vegetable oil. While all of that was happening, I combined my dry ingredients and eggs. I technically wasn't supposed to add the eggs yet but everything was happening so fast. I was barely done with that by the time my cornmeal was toasted and then I had to whisk the cornmeal with sour cream and milk. I even bought whole milk to use for my baking this holiday season!

Then came the real test. Now that the cast iron pan was preheated with oil, I had to take it out of the oven, add butter, swirl it around in the pan to melt it, and then pour all but one tablespoon into my cornmeal mixture. Yikes! I'd like to remind my dear readers that I had burned fingertips from the night before. I was not pleased about these directions. I also really don't know how you're supposed to measure "all but one tablespoon" from a very hot pan so naturally, I eyeballed it. It went better than expected but I suspect I left a little too much butter in the pan.

However, no time to think! Must keep moving quickly! We can't let that skillet cool down or all will be lost! I had to whisk in the butter/oil that I had poured and then add the dry mixture/mistakenly added eggs and whisk that up and then QUICKLY! scrape the batter into the cast iron pan and get that sucker back into the oven. I swear my heart was racing. I've never whisked so fast. I am very sure all of this stress was unnecessary. Oh well, into the oven, and time to clean up the kitchen. Oh look, somehow this recipe only dirtied two bowls. Madness. How did I spend a whole morning baking and not use my KitchenAid once? It's almost like I planned ahead for easy to clean recipes, knowing that I had people coming over in a few hours! (I didn't.)

About 15 minutes later, cornbread was done and it looked gorgeous. I had to let the skillet cool for 15 minutes before trying to remove it (during which time my husband woke up and I had to yell "DON'T TOUCH! HOT!" as he approached the skillet). I was pretty worried about flipping the cornbread out of the skillet but amazingly enough, it came out of the skillet perfectly. I let it cool the rest of the way before slicing it and sadly, I forgot to take a photo of the perfect cornbread before I cut it.


It had a really nice crispy crust and very good flavor but I think it was a little thick and dry for me. Still delicious but could've benefited from some butter or something with it. But considering I was serving it with chili, I thought it was fine. I think next time I'd either use a bigger skillet or be sure to incorporate more of the butter from the pan into the batter.

Overall, a delicious pair of Southern baked goods all ready before 11 am!

Wednesday, January 2, 2019

On a Christmas Baking Roll

Happy New Year to you all! We're going to have to roll the calendar back a few weeks though so I can tell you all about my holiday baking. So much baking! Let's start with a dessert that I brought to a friend's Christmas party: Red Velvet Snowflake Swiss Roll.

Since I've been watching so much Great British Bake Off, I've been craving a chance to attempt a Swiss roll. For those unfamiliar, it's basically a thin cake that you roll up with a filling to make a pretty spiral log. I decided to try this with a red velvet cake with a white chocolate cream cheese filling. And because I'm crazy, I also decided to try a technique where you bake a pattern into the cake itself. Sound nuts? You betcha!

Let's see if I can explain this baked pattern concept. Essentially, you use different colored cake batter to pipe a pattern onto parchment paper. You chill your pattern for a bit and then pour your main cake batter on top of the pattern. By doing this, your pattern bakes into your cake and when you roll it, you get pretty designs. If you're still having trouble grasping this, Google "deco roll cakes" and you'll see what I mean. In my case, I was planning to pipe snowflakes because ya know, Christmas.

I opted for a simple Taste of Home recipe for the red velvet roll because I wasn't too fussed about using the perfect cake recipe. The recipe didn't include the precious pattern-baking but I figured I could just add the red food coloring last and pull some of the batter aside for the piping. I mixed up my entire batter and then realized the fatal flaw: red velvet cake has cocoa powder. So the batter without the red dye isn't actually white. Dammit.

In my defense, I was baking this at about 8 am so my brain wasn't fully awake yet. It's not much of an excuse but I'll use it anyway. Also, I've never made red velvet cake before so it didn't even occur to me that it had cocoa in it. I'm not entirely sure I understand what red velvet cake is.

What's a baker to do? I guess make more cake batter. I obviously wasn't going to make a whole batch of dough without cocoa because I only needed a small amount to pipe. So (get ready, you're gonna love this...) I logic-ed that if the original recipe required 4 eggs, it would be easy to divide the recipe by 4 to get a reasonable amount of dough! Flawless plan, right? Except that now for other ingredients, I was dealing with minuscule amounts...I'm talking 1/4 and 1/8 teaspoons for some ingredients. I'd like to say I did all of my measuring precisely but I definitely did not. I was able to make all of my batter in a cereal bowl (because why would I use my mixer?) and was trying to hand-whisk the egg to cake batter foaminess. So dumb. I also just guessed a little bit on how much flour to add since I was eliminating the cocoa powder and was trying to get a pipe-able thickness. Silly me.

Now, here's where things get extra tricky. The recipe specified that I grease the baking pan, then put down parchment paper and then grease the parchment paper. I was curious what I should use for the greasing so I actually did a lot of research on this before starting. I couldn't find any reliable information. I also found that many recipes did not recommend greasing the paper so now I was feeling very conflicted about all of this. Eventually, America's Test Kitchen came through and said PAM would be fine. So I did that. Then I started piping snowflakes. Everywhere the batter dropped on the greased parchment paper, it just ROLLED AWAY. Obviously impossible to make a snowflake pattern like that. So I thought that maybe my batter was just too thin (totally possible since my mixing and measuring was a hot mess by then). I dumped the batter out of my piping bag, added some more flour, and refilled the bag. Better, but still ROLLING AWAY. I decided to test out the piping on a scrap of ungreased parchment paper and sure enough, flawless piping. Guess that solves that mystery!

I discarded my greased parchment paper in favor of ungreased and got to piping work. It was still really difficult to pipe. The batter was very thin and came out of the piping tip very quickly. After a couple of mushy looking snowflakes, I switched out my piping tip for the thinnest possible tip and things went a bit better. However, the snowflake template I had printed out ended up being way too small to be reasonable so I needed to freehand all of my piping. Eventually I started to get the hang of it a bit but only ended up piping half the parchment paper. Which was fine because you can't see the pattern on the inside of the roll anyway. I also added a few polka dots between the snowflakes to fill out the pattern. Oof. Already stressful and I haven't even rolled a cake!

I put the design into the fridge to set for a bit while the oven preheated. I was pretty worried about my oven because it's important to not overbake the cake for a Swiss roll or it'll just crack when you try to roll it. I set up my oven thermometer so I could see it easily and I could keep an eye on the temperature and made sure I got it set to the correct temperature before baking. I was determined to not screw this up. I poured my red velvet batter over my pattern on the pan and put it in the oven for 12 minutes. After 13 minutes, it was done. I had to test it by seeing if it springs back when I touch the middle. Success! Now to cool for 5 minutes and then roll the cake up with the parchment paper while it was still warm. Actually, let me amend that statement. The recipe said I should flip the cake and peel off the parchment paper and then roll it in a towel. I've seen a lot of conflicting advice here but since my pattern was on the bottom, I didn't want to be flipping any cakes around. Plus Mary Berry just uses the parchment paper and no towel. So, hot cake in hand (seriously hot cake! Don't let it cool or it'll crack!), I started to carefully roll my tight spiral. I am shocked and pleased to report that it was extremely easy. Then I had to let it cool in its spiraled form.

A few hours and a couple of wrapped Christmas gifts later, I revisited my cake and whipped up the white chocolate cream cheese filling. This was a very simple filling of cream cheese, vanilla, white chocolate, butter, and powdered sugar so not much to report there. The real challenge is the filling and rolling of the cake. I very carefully unrolled my cooled cake and immediately realized that I had a problem. When I rolled the cake, the side of the parchment paper that had been greased to the pan was on the inside of my roll and it made the inside of my cake a bit greasy and a bit inclined to bleed red food dye on my hands. The side that had been ungreased was completely fine though. Well, at least the greasy side would be the side with the filling so I guess it's fine? The other problem was that my first couple rolls were so tight that it didn't want to unroll very nicely without cracking. My solution to this was to just spread the filling up and around the slightly rolled end. Not ideal but not terrible either. I was also careful to not put too much filling at the end of the cake since I knew a bunch of it would squish toward the end as I rolled.

So I took a deep breath and started gently rolling and peeling off the parchment paper as I went. This was a slow process because the parchment paper did stick to the cake just a little bit. I had to be very gentle. Finally, I rolled the whole thing up with only the tiniest of tiny cracks in the top of the cake. Honestly, if you hadn't been looking for it, you wouldn't have noticed. I also had bright red hands and a bright red countertop but whatever! Amazingly enough, the pattern looked great in the cake (apart from the fact that my piped snowflakes are totally janky) and I plated it with some white chocolate snowflakes that I had piped earlier and voila! Christmas cake!


I'm very proud of the way it looks even if the snowflakes don't look great. I got a nice tight swirl in there and cut clean ends so you could see all the layers. I think the white chocolate snowflakes added a nice festive touch (and taste better than royal icing snowflakes). And it tasted good! I would definitely try this again sometime when I have more forethought on the design and cake colors and less time pressure and holiday madness.

Wednesday, December 19, 2018

I Refuse to Use More Parchment Paper!

'Tis the season for cookie baking! Let's dive right in to the annual Christmas cookie-palooza with my dear friend. Last year, you'll recall, was our "Back to Basics" Christmas after a truly disastrous adventure the previous year. Having regained some of our baking mojo, we set out on our 7th year of baking insanity with a definitely manageable list of cookies:

1) Palmiers (a staple I cannot live without) - double batch
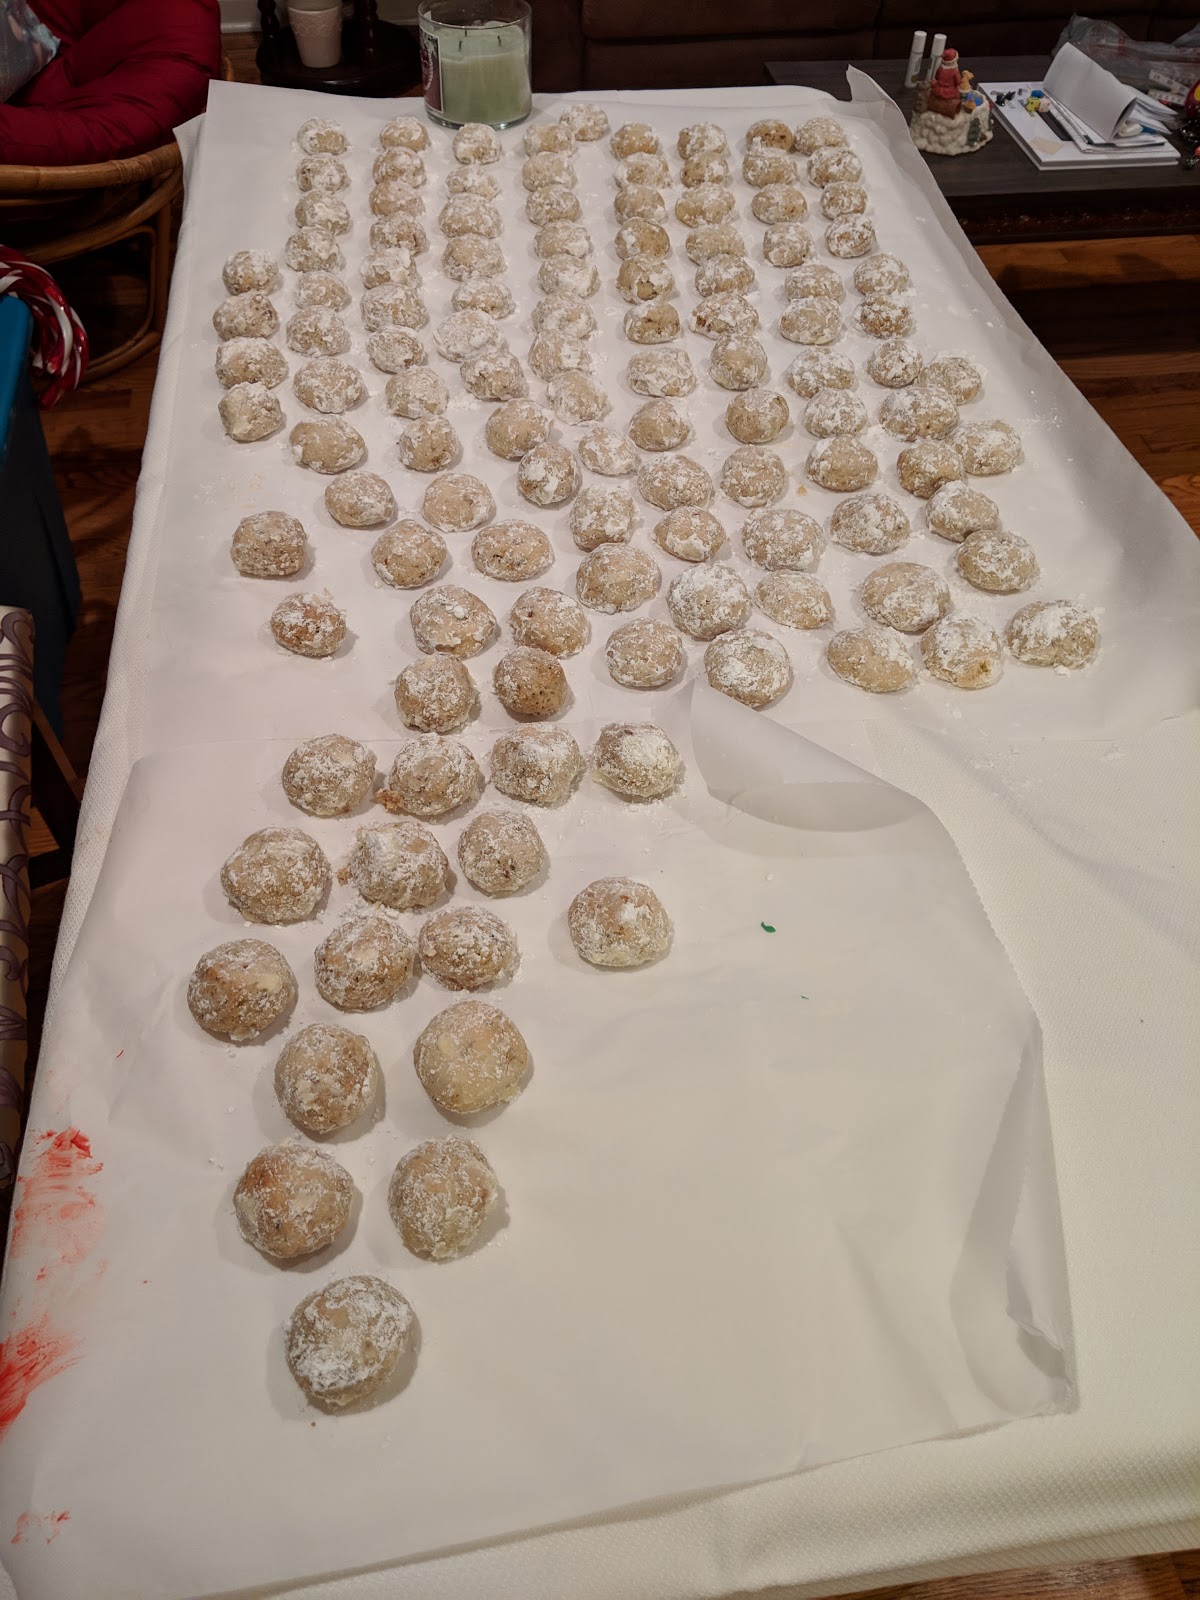
2) Walnut balls (taking careful note of the correct recipe) - triple batch
3) Spritz (cookie press) cookies - triple batch
4) White chocolate ginger cookies (huge hit from last year) - double batch
5) Something chocolate (yes, that's what our planning list said) - who knows because we haven't picked a recipe yet
6) Walnut kiffles (special request from my sister) - single batch
7) Zebra cookies (new recipe that I saw in the Bon Appetit Christmas issue) - single batch
8) Something with jam - single batch

8 cookie types, lots of batches, approximately a day and a half, and a casual goal of 1000 cookies. But actually casual. We didn't really expect to get to 1000 cookies. Our main goal this year was to have fun!

So we're off to the races! We did the absolute minimum level of planning which included thinking about which cookie doughs would need chilling in the fridge and then we went to the grilled cheese restaurant. Priorities, people. That said, I think we ultimately got started somewhere around 2:00. I had bought all of the ingredients in the morning, ensuring that there would be no whipped butter disasters this year, and had taken the butter out to soften. Apparently there was too much butter in too close a proximity for it to soften well so we had to use the good ol' microwave trick. We decided to start with the ginger cookies because the dough had to chill and then they'd be ready for whenever we had "down time" for dipping in chocolate and decorating. We both worked on this dough and I swear it was completely ready in approximately 8 minutes. Into the fridge!

Next, we decided to work on the zebra cookies because they were new and different and required chilling as well. The idea behind these cookies are pretty similar to any icebox sugar cookie. We were supposed to split the dough in half, flavor one chocolate, layer the white and chocolate dough into stripes, roll it into a log, chill it, cut it and bam! Zebra stripes! Yeah, that didn't quite happen. The error here was in my definition of "half." You see, when you're eyeballing half the dough and THEN you're adding the dry ingredients, if you don't do it accurately you end up with one very wet dough and one very dry, crumbly dough. In my defense...I have no defense. I took a lazy way out and paid the price. When we were trying to shape our logs of striped dough, we ended up with very sticky chocolate dough and very dry regular dough so we couldn't get quite that striped effect. I believe my assessment was along the lines of "eh, it'll still look fine" and moved on. I'll jump ahead a bit to tell you that there were further consequences to this decision-making. We had to roll our chilled logs of dough into colored sugar (I had both red and green for maximum Christmas spirit!) and the chocolate dough got very sticky with the sugar and the sugar didn't stick to the other dough very well. Oh yeah, and somehow the colored dye was coming off in a liquidy mess on the parchment paper. Still don't quite understand why. Anyway, when we sliced the cookies from the log, they definitively did not look like zebra stripes. More like blobs. Or ultrasounds. Or Christmas Rorschach tests. They looked like this:


We call them: Art Deco Cookies. Hey, if not for this blog, it's not like you would know what they were supposed to look like, right? Hilariously enough, the next day, my friend looked at the cookie table and said "Wow, those zebra cookies actually turned out really well!" and then realized she was looking at the magazine photo and not a physical plate of cookies that we had made. We may have been a little delirious by then.

Anywho, backtracking to when the Art Deco Cookies were chilling, we used that time to make the dough for the spritz cookies. There was an initial debate over tripling or quadrupling the recipe but my friend wisely convinced me that quadrupling wouldn't have fit in the mixer. She was right. Tripling barely fit in the mixer. So since we were tripling, we decided to make trees, wreaths, and snowflakes. And for some reason, I was entrusted to third the dough. I did this...poorly. We have at least three times as many trees as the other shapes. Whoops. Also, because my oven temperature is a hot mess of crazy, we slightly burned one of the batches. But that's ok, they went in the husband pile.

After that, I started monitoring the temperature a bit. It was crazy. In summary, sometimes when the oven was set to 450 it was up at 500, sometimes when it was 350 it was 325 (or 400!), and all the times it was frustrating the hell out of me. I ended up effectively monitoring the temp and changing the setting all willy-nilly hoping to get close to the target temperature. Stupid oven.

After our one batch of cookie burn, all the rest went smoothly and we baked up the rest of the spritz cookies and the ginger cookies. With those cookies done, we decided it was time for pizza, wine, and Christmas movies. Nothing beats an evening of baking, a glass (or several) of wine, and the questionable Christmas classics Christmas in Connecticut and The Christmas Chronicles.

Rise and shine early in the morning for day 2!

I was up first and was just sort of putzing around the kitchen when I decided, "hey, I might as well do something. I'll make the jam!" Because we were making jam sandwich cookies and why would I use jarred jam when I could just MAKE jam?!? (I'm crazy.) I've never made jam before. I had no idea how to make jam. I found recipes that had me boiling raspberries and sugar and lemon juice anywhere from 4 minutes to 20 minutes. I don't even really eat jam so I had no frame of reference for this at all. So there I was, in pajamas, boiling sugar and raspberries, and pondering why I needed to freeze a spoon to decide if my jam was done. Apparently there's some sort of test where you put a drop of jam on the back of a frozen spoon and then if you can run your finger through it and get a line then it's done. By the time I did that, I got my line with no problem. Which was weird because the jam in the pot still looked so liquidy! So I quickly transferred the jam to a container to cool off. By now my friend was up and we both tasted the cooled jam. It tasted really good but the consistency was less jam and more "dear god, why is it sticking in my teeth like a raspberry jolly rancher?!" Yep, I candied my jam. Didn't know you could do that. I nearly chucked the whole batch but a quick Google search showed me that I might be able to save my jam by heating it slowly with about a cup of water to re-liquid it. That....worked! I was shocked! Jam disaster averted!

With that done and our ginger cookies dipped in white chocolate and laying out on parchment paper (I literally can't remember if we did this the previous day or not), we headed off to Zumba. Because it's not enough exercise to just bake for two days obviously. Once we got coffee and came back, we set to work on the zillion batches of palmiers. I actually remember how to make them without consulting the directions now but the problem is that they must be baked on parchment paper and they must be monitored constantly and we can only bake about 8-10 cookies at a time. So they take forever. At least it was passive enough that one of us was able to shower while the other monitored the cookies. Plus my many baking pans meant we could cut them all and lay them out on pans and get on with other tasks like making the dough for the jam sandwiches.

The jam sandwiches were a pretty simple sugar cookie recipe but the dough needed to chill and I needed to find some cookie cutters. Fortunately, my gigantic box of cookie cutters has all of the letters and an "O" was perfect for the tops of the cookie sandwiches to get an adorable window of jam. Stay tuned for how well the assembly of the cookie sandwiches goes...

So let's see, palmiers are baking (FOREVER) and we had some downtime so that's a perfect time to pipe the holly onto the ginger cookies. We melted the candy melts in my new microwave with some shortening and started piping. On a table this year because I thought ahead and remembered how much piping on the floor killed our backs. This went alllllllmost seamlessly. The one mishap was when my dear friend needed to take palmiers out of the oven but was afraid of red chocolate leaking out of her piping tip so she turned the whole bag upside down. Red chocolate POURED onto the table, the floor, her pants, and her socks. It was like the scene in the Shining. Clearly she was experiencing baker's brain. (On the other hand, we really melted that chocolate perfectly if it poured out of the bag that easily!)

So with that mess cleaned up and the palmiers finally just about done, we decided we desperately needed food. We had Zumba-ed and had been baking all morning and it was now about 1:30 and we were getting hangry. Long overdue for a break.

[Healthy salad lunchtime!]

Now fed and watered, we got back to work. Only jam sandwiches to assemble, walnut balls to bake, chocolate cookies to bake, and kiffles getting struck from the list. Since it's too important to not mess up the walnut balls, we tackled that next. Really it was just me chopping all of the walnuts and my friend making the dough. We tripled this recipe but somehow managed to fit all of the cookies on two pans. Once we got that ball rolling (GET IT?!?!), I set to work rolling out the dough for the jam cookies while my friend made the chocolate cookie dough.

I should use this moment to point out that it was a gorgeous, warm day outside. Which meant it was a hot as hell kitchen inside. I didn't realize how hot it was until I opened the window and finally felt like I could breathe. Anyway, the problem with this beautiful day was that rolling out chilled cookie dough for cutting had to be done extremely quickly. The recipe had dictated to roll out the cookies on parchment paper. I would never do this again. The paper kept sliding everywhere even when I weighed it down with random kitchen tools. Plus it was hard to lift the cut cookies off the paper. I was working as quickly as I could but it was just awful. I cut out the bottoms of the cookies but needed to re-chill the leftover dough before I could reroll it to make more. Then I had to do the same thing with the tops of the cookies and everything was getting so warm and the shapes were warping and I just couldn't care by then. I have some wonky jam sandwich shapes.


Ultimately they got cooked (on parchment paper, of course) and filled with jam and they look really cute (albeit messy). P.S. I now have about 5 more cups of jam to use. Any ideas?

While all this was happening, chocolate cookie dough was being made. We tripled that recipe which was INSANE. It was also apparently a new recipe because we couldn't remember which chocolate cookies were made last year and I was too tired to look it up. The result was chilling a gigantic log of chocolate dough that looked...unappetizing. Let's leave it at that.

The final step of the day was to bake the chocolate cookies. I swear, we thought we would never roll out all of that chocolate dough. There was so much of it. I read in the recipe that we were supposed to bake them on parchment paper and I lost my mind and yelled, "HARD NO. NO. MORE. PARCHMENT. PAPER." So we skipped that step and I do not apologize for it. Now the problem was, these cookies take about 15 minutes and they grow. I mean, they get giant. Even though we were actually rolling the balls tiny, they filled the entire tray. It was making us really mad. We just wanted to be done. We were so exhausted that while the chocolate cookies were baking we just laid on the floor and stretched. It felt really good. Eventually, we got the last cookies out of the oven and breathed a collective sigh of relief over another baking weekend well done.


Final roundup: we started out targeting 8 types of cookies and only downgraded to 7 so that was pretty good for us. We used 5 lbs of sugar over the course of one weekend. We determined that I can't divide dough and should never try. The ginger cookies look way too cute and perfect to even be real. Jam apparently can magically turn into candy and then back to jam. And we should get together and bake more often because as frustrating as it was at times, we had a lot of fun. Final tally: 757.

Tuesday, December 11, 2018

Checkmate!

This installment of A Statistician Bakes is brought to you by: sort of using a ruler. I wanted to make some impressive-looking cookies for my holiday potluck at work and because I can never do anything halfway, I picked Checkerboard Cookies. I've actually been dying to make these for a while but they seemed so tedious and you have to refrigerate the dough for a while and I rarely meet a sugar cookie recipe that I enjoy. But my trust in the America's Test Kitchen is absolute so I decided to dive in...and instantly deviate from the recipe.

For those of you who have been living under a rock, checkerboard cookies are sugar cookies with half the dough flavored with some chocolate and then the dough arranged to look like a checkerboard. Done well, they look really good. Here's my problem: the America's Test Kitchen recipe only describes a 2x2 checkerboard and I think that looks lame. So instead of doing the sensible thing and splitting the dough in half to design my cookies, I decided to go with 4 squares of chocolate dough and 5 squares of regular dough to get a 3x3 checkerboard. Math! You'll see how that turns out.

Since I was baking for a large party, I decided that instead of cutting the dough in half and turning one half chocolate, I would just make two batches of dough. Spoiler alert: I had way too many cookies. Anyway, I made my regular sugar cookie dough first. Devotees of this blog will recall that I am now worshiping at the alter of my digital scale and am weighing my flour and sugar. I held fast to this belief and bing, bang, boom, my sugar cookie dough was done in no time. It was seriously so much faster weighing ingredients! Why carefully measure out 2 1/4 cups of flour when you can dump 11 1/4 oz into a bowl on a scale? I wish I had timed myself because I think I broke some sugar cookie dough-making records.

I tossed the dough on the counter to roll it out into two 6 inch long squares. Well sort of. First I cut the dough in half. Then I rolled the dough out to 6 inches long. Then I tried to make it square-ish. Then I cut the dough into quarters lengthwise so that I had 4 long rectangle pieces. And then I confused myself about how many rectangles I needed. Bad baker, each 6 inch completed log should have 5 long rectangles! Not 4! So I kinda fudged it and cut off a piece from the dough I had set aside to roll out the bonus two rectangles I'd need. Confused yet? I sure was. I also tried half-heartedly to square up the edges so I would get some nice clean lines but I'd be lying if I said was patient enough to do that well. Anyway, rectangles made, it was on to the chocolate dough!

I melted some semisweet chocolate on the stove while I washed all of my tools. Well, sort of washed. Come on, the same exact stuff is going in. I wasn't going to lose my mind over it. And then I followed the exact same process adding melted chocolate and cocoa powder. I even weighed the cocoa powder! Then I grabbed the measuring spoon that I had used for the salt to add 1/2 tsp and...oh shoot, that's the 1/2 tbsp measuring spoon. Well....crap. I put 1/2 tbsp into the regular dough instead of 1/2 tsp. Here's some more math, folks: that's THREE TIMES the amount of salt I should have used. I stood frozen at my counter for a few minutes. What should I do? Should I chuck the whole thing and start over? But I already made all of those annoying rectangles! But what if the cookies are super salty? But I already made all of those annoying rectangles! But baking is an exact science...shut up and just move on, internal monologue!

So that happened. And I just pretended it never happened.

With that all in mind, I finished up my chocolate dough and went to roll it out. But then I thought, if I made 5 logs from the regular dough and I only need 4 logs of chocolate dough and the intent is for all of these square to neatly fit into a checkerboard pattern, they should logically be the same thickness. At this point, I was over it, cut off a bit of chocolate dough, chucked it in the trash and declared them even. I rolled out the chocolate logs and then set about arranging them. It was actually surprisingly easy. The only problem I had was not getting crisp right angles at the junctions because I had been lazy with my rolling earlier. But I guess that's something I should only care about if I want them to look professional. I wrapped up my two now-giant logs of dough and put it in the fridge to chill.

[Two hours later]

Ok, time to cut them! The beauty of these cookies is that they're so easy to cut once the dough is chilled and they reveal such a lovely pattern once you cut them. I was supposed to cut them 1/4 inch thick and for once, I actually measured. Well, for the first 5 or 6 cookies. Then I eyeballed it because I prefer speed over precision. Clearly. I baked them up (two sheets, 3 batches!) and called it a night. Here are the checkerboard cookies for your judgement:


I think they generally looked pretty good except for the fact that they're all wobbly on the edges. However, people at work LOVED them. They thought I had purchased the cookies. So maybe I'm too much of a perfectionist for my own good? And they were pretty tasty cookies. People really liked them and someone even asked me for the recipe.

I told no one about the salt.

But I could totally taste the salt.

Good recipe. Next time, less salt.

Friday, December 7, 2018

Science Experiment Brownies

It's time to science the sh*t out of this. I have a new cookbook! I finally caved and actually joined America's Test Kitchen because I love all of their recipes so much. Then I agreed to do a phone survey on my experience with the website in exchange for 50% off a cookbook. I opted for the "Science of Good Cooking" and I am beyond thrilled with it. I literally want to sit at home reading a cookbook for fun. It has recipes but also has pages and pages about why they actually work. It's so fascinating! So when tasked with making brownies for my choir's holiday party, I decided it was time to test a hypothesis and bake with some science.

I opted for the Chewy Brownies which were described as the closest approximation to boxed brownies that we could get. Everyone knows boxed brownies are good but it's more fun (and impressive) making things from scratch. So what's the secret of boxed brownie goodness? Apparently it's all in the ratio of saturated to unsaturated fat. For boxed brownies, it's 28% to 72% and for traditional homemade brownie recipes, it's closer to 64% to 36%! Wow! This recipe uses a combination of butter and vegetable oil to get a ratio of 29% to 71%. Was that enough math for you? Too bad, there's more!

Since I was already geeking out over learning about the science of making brownies, I decided to go one step further and actually weigh my ingredients for the first time ever. America's Test Kitchen always supports weighing baking ingredients but I never have because hey, I've got those convenient measuring cups. But when I read a section in the cookbook about the variability in the amount of flour measured by the professional cooks at the test kitchen who were all using the same scoop-and-sweep method, I got curious. So I busted out my digital scale (because I'm fancy like that) and measured my 2.5 cups of sugar the way I normally would and put it into a bowl. When I weighed it, it turned out that I was nearly half a cup UNDER the amount of sugar I needed! Huge difference! I tried the same thing with the 1 3/4 cups of flour. It turned out that I was about a quarter cup OVER on the amount of flour! I would never have believed that my measurements could be so far off if I hadn't tested this. My life is forever changed.

Ok science nerdery aside, let's get to the actual baking. The first step was to whisk cocoa and boiling water until smooth. Oh yeah, here's another bit of science: the book recommends always "blooming" your cocoa in boiling water to bring out the cocoa flavor. The earth just shifted on its axis again. Anyway, next was whisking in unsweetened chocolate (I won't bore you with the explanation about the science behind using unsweetened chocolate) and I was actually clever for once and used my food processor to chop up the chocolate into tiny pieces so it melted easier.

While all of this was happening, I was melting half a stick of butter in the microwave. I could have done it on the stove but didn't want to dirty the pot. Mistake. I swear I was melting it in 7 second intervals. It was barely half melted when I put it in for another 7 seconds and then BOOM. It sounded like there was an actual explosion in my microwave. I opened it up and not only were the door and the entire top of the microwave covered in butter but not all of the butter was even melted! What the hell? So I got annoyed and cleaned it up and my perfect measuring and science was probably screwed up because of all of the lost, exploded butter but onwards and upwards. It didn't occur to me to ditch the butter and start over. I just went with it.

I added in the stupid butter and the vegetable oil and got whisking. Ever notice how brownie recipes never want you to use an electric mixer? I've never made brownies where I used something other than a large bowl and whisk. I guess it's unnecessary to use a mixer but...weird. Anyway, next was two eggs, two egg yolks, and vanilla and then the sugar, flour, and salt. Finally, I was instructed to fold in bittersweet chocolate pieces. I used bittersweet chocolate chips. This was likely also a mistake. The idea was supposed to be that the bittersweet chocolate would create "gooey pockets of melted chocolate" in the brownies and spoiler alert: that didn't happen. Because there something added to stabilize the shape of the chips, I didn't get quite the effect I was going for. I shouldn't have substituted the chips but who really wants to chop chocolate into 1/2 inch pieces?

Anyway, into the oven to bake. The temperature of my oven is still a great mystery but since I was instructed to bake on the lowest rack (an unusual instruction), the temperature was a bit more stable than normal. I remembered to foil sling and the baking time was quite accurate. Then all I had to do was wait for them to cool. Brownies take FOREVER to cool. I was supposed to let them cool in the pan for an hour and a half then remove them from the pan and let them cool for a whole extra hour! Fortunately I made these in the morning before the party. Then I sliced them nice and small and dusted them with some powdered sugar snow and tasted one. Wow. SO GOOD. They weren't quite as moist as I wanted but I think that's down to the exploded butter. They were a huge hit with people. Everyone who had one really loved them. Just one problem: I didn't take a picture! Noooooooo! All I had left was the one brownie I left home for my husband which didn't even have powdered sugar.


Sad. They looked so pretty. But they tasted great and I'd definitely make these again. And I learned so much science too! I am still aghast at how off my sugar and flour measurements were and fully intend to measure these from here on out. Only problem is that a lot of recipes don't specify the weights. So I guess it's time to memorize how much a cup of sugar and a cup of flour weigh! I feel like I've powered up and advanced to the next level of baking! [Insert triumphant Super Mario music here.]

Thursday, December 6, 2018

Lazy Thanksgiving Dessert

Alas, I've fallen behind on my blogging again! So get ready for some blitz blogging as I inch ever closer to my 100th baked good! Thanksgiving was only two weeks ago (but it feels like it was about 5 years ago already) and I always struggle with what dessert to make for Thanksgiving. We always have way too many desserts and we're always way too full to eat the ones we have. So I opted for a quick and easy dessert that would look festive and that my sister would actually eat: Rice Krispie Treats that look like pumpkins.

On paper, super easy. Just make Rice Krispie Treats as normal, dyeing the butter and marshmallow orange along the way, shape into balls, add a mini Reese's for a stem and a green M&M for the leaf. Voila! Fast, adorable, easy.

It's me, it's never easy.

To start off with, I basically never make Rice Krispie Treats. I'm far from the expert. I actually thought you toss the whole box of Rice Krispies in. You don't. So while I was melting marshmallows and butter and unwrapping mini Reese's, I realized that I also needed to measure the Rice Krispies. Ugh. This recipe was already annoying me. I did manage to dye my mixture a perfect orange with my fancy food dye kit. Anyway, not much to talk about with a three ingredient recipe so let's get to decorating.

I had to shape the treats into balls. Ostensibly, I was supposed to make 12 but those would have been giant so I went a bit smaller. Now, there were lots of Pinterest tips and tricks for making these without them sticking to your hands and I opted for the "use wax paper" approach. I put a spoonful of oozy melty goodness onto some wax paper and tried to shape it into a ball...and it stuck all over the wax paper. No dice. At this point, fortune smiled upon me and my sister walked by and said "what are you doing? Spray your hands with some PAM, idiot." Ok, I'm paraphrasing but she did give me the "you idiot" look but then was nice enough to help me out a bit. I bow to the Rice Krispie Treat expert.

Spraying hands with PAM worked like a charm. No more sticking. Now there was just the issue of rolling hot Rice Krispies into a ball and then adding the mini Reese's and M&M. The problem was, I would roll a ball and then press the decorations in, which would flatten the ball and make it all misshapen. Plus the hot Rice Krispies were melting the Reese's and M&Ms. Contrary to popular belief, M&Ms can in fact melt in your hand. I eventually developed a system of rolling, pressing in the decorations and then reshaping my pumpkin into a ball. Oh yeah, and I had to work fast because the Rice Krispies were rapidly cooling and hardening. No time to think! Go! Go! Go!


They're cute but a little annoying. Probably a good baking project for kids. But overall, they were a bright and festive addition to the table and I'm glad I tried it. So that I don't need to try it again. Ever. But let's face it, it's far from the most annoying thing I've baked. I never learn.

Friday, November 16, 2018

Not Quite My Jam

When the frustration of untreated roads in a snowstorm that everyone knew was coming leads to a 3 hour commute home, what better activity is there than baking? Clearly I wasn't going to make it to the supermarket for ingredients so I was left foraging in my pantry to bake with whatever I had on hand. After a few false starts due to lack of ingredients, I found a recipe I could make: Raspberry Pecan Thumbprints. I've never actually made thumbprint cookies but they always look very pretty so I've been wanting to try it for a while. This recipe comes from the old classic, the Favorite Brand Name Bake Sale Cookbook. I didn't notice what the brand name ingredient was though. Whoops.  I set to work softening my butter while I gathered the rest of my ingredients...and realized that I didn't have pecans. Oops. Now they're Raspberry Walnut Thumbprints! I'm still amazed that I had raspberry jam but no pecans!

Moving on, I creamed up the butter, added the brown sugar and the vanilla, and then pondered if I should actually mix the dry ingredients as directed. Nah. Nonsense. So I chucked in the allspice, cinnamon, and salt, gave it a quick stir, then tossed in the pecans walnuts, gave it another quick stir and finally added the flour. Dough complete. Very easy.

But the dough is not the challenge of thumbprint cookies! Oh no, it's the shape and the filling. So here we go. I was suppose to roll one inch balls, flatten slightly, then press my thumb in, smoothing any cracks that form. I have no idea how big one inch is and I will never measure so I just guessed. It didn't help that the recipe didn't specify how many cookies this recipe would yield. So I couldn't even figure out if I was on the right track or not. I ended up making roughly two dozen cookies. In hindsight, I think I should have made them smaller but oh well. I rolled them all out and pressed my thumb into them like a pro. Except I didn't really like the look of them. Maybe it's because I have long nails or maybe I don't know how to properly thumbprint but all of the indents were oblong instead of circular. I feel like an actual round tool would have been more appropriate. Next time, Gadget.

Next, I had to fill the thumbprints with "a heaping 1/4 teaspoon of jam." I take issue with this direction because by the time you make 1/4 teaspoon heaping, you've basically got a half a teaspoon. I pretty much ignored this direction and put in enough to fill the holes. And since I think I made my cookies too big, it was at least a half a teaspoon in each. It was also really difficult getting the jam out of a 1/4 teaspoon scoop but I managed a system of using the back end of a spoon to scoop the jam out of the measuring spoon. I do weird things in the kitchen.

Finally, I was supposed to "scatter the remaining pecans walnuts over the filled cookies." Yeah, no. I see a lot of issues with this direction including that I didn't want any walnuts actually in the jam. Plus, I knew just scattering the nuts would mean that they wouldn't stick. So, like a crazy person, I actually pressed bits of walnut around the sides of each cookie. For what it's worth, by doing it that way, it looked exactly like the picture. It took a while, but hey, what else is there to do when you're snowed in? (Lots. There were lots of things I could have been doing in my house but did not.)

Now, before tossing these into the oven, a slight diversion on my oven temperature. I finally bought an oven thermometer and the conclusion is...I have no freakin' clue. I tested it once before when it was set to 350 and it was reading 400. Today when I tested it, it was reading 325. So I turned up the heat to 375 in hopes that it would get to an actual 350. Then it was actually 375. So I turned it back down. Then it was back down to 325. Then it was back up to 365 for no reason that I understood. I have no idea what's going on or how to fix it. My oven sucks. So I just landed on "I guess I'll keep an eye on my cookies" and tossed them in.

I was pretty curious to see how jam behaves in the oven. I didn't perfectly fill the thumbprint holes in case the jam expanded a bit to fill the holes. This was an inaccurate guess. The jam stayed pretty much exactly where I put it and cooking it just made it set. Well now I know. All in all, they didn't turn out to be the prettiest cookies as a result.


The cookies grew a bit in the oven which only emphasized the weird shapes of the jam. Alas. But look at that excellent walnut decoration, right?! As far as taste goes, I liked the base cookie a lot but I think the jam makes them way too sweet. But I don't really like sweet things so they're probably fine. Since I was home alone, I had no one else to taste test so I'll have to wait for some other opinions. All in all, not a bad snow day's work. The whole baking/cleaning process took me only an hour from start to finish so I deem these quick and easy cookies. So go try to make some cookies with whatever is in your pantry! You never know what you might come up with.

Tuesday, October 16, 2018

A Tuile Good Time!

The Great British Baking Show is clearly warping my brain. No longer do I do anything simple like a basic drop cookie. Instead, I spend my time making delicate lace cookies and rolling them into precious shapes. On the other hand, I've been wanting to try to make tuiles for a while now so I guess now's as good a time as any!

I went with a lace cookie recipe from (you guessed it) America's Test Kitchen. I know, I know, I should probably start to open my other cookbooks but this one is so foolproof. I've never actually had a lace cookie and I don't really know the difference between a lace cookie and a tuile. I speculate that a lace cookie becomes a tuile when you curve the warm cookie into a cigarette shape or any sort of curved shape. I guess I could look it up but I don't much feel like it.

Anyway, back to the kitchen. I started out with boiling my butter, dark brown sugar, and corn syrup on the stove. My dark brown sugar was a little bit clumpy but I figured since I was dissolving it, it wouldn't matter in the end. (It didn't.) After boiling the mixture for a few minutes, I took it off the heat and mixed in vanilla, salt, flour, heavy cream, and finely chopped almonds. Basically the easiest recipe ever. The only bad part about it was using up the last of my good Mexican vanilla! Anyone I know going to Mexico anytime soon? I could really use some more.

For once, I actually followed the parchment paper direction and lined the pan with the paper. I usually skip this because I hate cutting parchment paper but the cookbook warned me that these cookies get really sticky and hard to remove and that timing is critical to success. Ok. Next I had to drop rounded teaspoons of batter at 4 inch intervals. That's....very little batter for a very large area. I could only bake 6 cookies at a time. And since I'm terrible at measuring things by eye, I even used my teaspoon measure to dole out the cookies. The problem with this was the fact that a teaspoon is quite small and the batter was quite sticky so getting the batter out of the teaspoon was a challenge. I ultimately got another spoon and had a bizarre method of double scooping but I got those tiny, round balls on the pan eventually.

Then they had to bake for 5-7 minutes or "until deep golden brown and bubbling has subsided." They needed about 6 minutes in my oven and wow, did they ever grow! Good thing I was only making 6 at a time! Once taking them out of the oven, I had to wait 1-2 minutes for them to cool before shaping them. I even set a timer to be sure. Probably overkill but timing was CRITICAL! Initially, I decided to simply shape them into curves by putting them on my rolling pin. After the first two, I realized I needed to shape them a bit with my fingers around the curve of the rolling pin to make it the right shape but by then, the other 4 were cooled. I could have put them back in the oven to soften them again but I didn't bother since I had another 2 dozen or so to make. Clearly, working fast was key to the process. Actually, the book recommended only baking two cookies at a time if this was my first time making tuiles but that seemed insane to me. I'd just have to work faster.

For the second batch, I did four quick rolling pin tuiles and then decided this was way too easy and wanted to make the cigarette shape. I don't have any dowels for shaping or anything so I decided to use the handle of my wooden spoon. That actually worked perfectly. Except I decided to do this way too late and my last two cookies were cooled. Damn. Next batch then.

By the third batch, I planned to roll one cookie, put four on the rolling pin, and then roll the last cookie. The rolling definitely required practice. It was a very delicate balance of moving fast but not cracking the cookies and, oh yeah, not burning my finger tips. Ultimately, I got a few good looking ones but realized I was actually rolling them inside out. That is, the smooth side was facing out instead of the bumpy, crispy side. (Who am I kidding, the whole cookie is crispy.) So for the next batch, I had to flip the cookie over and then start rolling. I was clever for once and did all of this flipping and rolling nonsense on a piece of parchment paper. By the last batch, I was definitely getting the hang of it. I even went so far as to put the over-cool cookies back in the oven to soften because flat cookies are boring. How do you think I did?


They're pretty good, right? Not pictured: a bunch of flat cookies and less pretty cookies and half-broken cookies. One advantage to half-broken cookies though is that I get to taste them! I thought they tasted really good but they were a little bit sweet for me. I don't really know what they're supposed to taste like though. Oh, and one more thing: these little babies are FRAGILE. When I was moving the plate of cookies into the dining room, I may or may not have accidentally walked into the wall and two cookies slid off the plate and shattered on the floor like glass. Of course, the two most perfect cookies. No exaggeration though, I've broken glass on my kitchen floor before and these cookies shattered the exact same way. So it wasn't a perfectly perfect bake but it was generally pretty nice. And quick and easy enough that after baking these, I immediately started baking some chocolate cakes. But that's a story for another day. Coming soon to a blog post near you!

Friday, October 12, 2018

My Eyes Were Bigger Than My Cake


Last stop on the catching-up-on-blog-posts train is my attempt at the Kit Kat Spa cake as prominently featured on Nailed it! The idea behind this is that you build a small two layer round cake, surround it with Kit Kats to look like a fence, top it with ganache to look like mud or water, and then add little modeling chocolate animals so the whole thing looks like pigs in a mud bath or ducks on a pond or a woman soaking in a spa. You know, something adorable like this (image not mine - it's floating around on Pinterest pretty much constantly):
 
Image result for nailed it netflix kit kat cake

I decided to go with ducks in a pond. Because I think I can actually make rubber duckies out of modeling chocolate and if all else failed, I would straight up put actual rubber ducks on the cake. Sound good? Let's go!

The first thing I did was make the modeling chocolate. The last time I tried to do this, I really screwed it up and all of the oil leaked out. This time, however, I was very careful about following the directions and heated up my corn syrup and chocolate to the appropriate temperatures. I was careful to not overwork the chocolate and it came together pretty nicely! Yay for nice yellow rubber ducky chocolate! I put that aside since I made that well in advance and then I went and got an appendectomy. Yeah, surgery sort of derailed my cake baking schemes. The only thing I was really planning on doing in advance though was baking the cakes and freezing them now that I know the magic of freezing cakes. 

Once I was feeling better and could safely lift my KitchenAid onto the counter, I went about making my cakes. I decided to go with America's Test Kitchen again since it tasted so good but I didn't want to be boring and decided to make the marble cake. Basically this is the same as the other cake I made except in the last steps. Before filling your pans, you're supposed to separate a third of your batter and add melted chocolate to it. Then, when you fill your pans, you put in half of the white batter, then the chocolate batter, then the rest of the white batter in layers. Using a sharp knife, you then make marble-y shapes and then bake. 

The recipe specified that this was for 2 8- or 9-inch round cakes. I would have preferred to make 8-inch cakes but I only have one 8-inch pan. Meanwhile, I had 2 9-inch pans. I wanted a taller cake but I really didn't want to bake in two batches. My laziness won out and I went with the 9-inch. Mistake. 

Well, actually, there were several mistakes going on. First, my oven temperature, which I've mentioned (and which I should really really really check!). Second, using too large a pan. As I filled the pans with my very scientific eyeballing method, it did seem like the batter was a little bit low in the pan. But I figured that if I wasn't overfilling the pans, I'd have a better chance of not getting that domed top and having to level my cakes. Wrong on so many fronts. After the timer went off, I pulled out my cakes and not only did they have domed tops, they were FLAT. I mean, ridiculously flat. To illustrate my last remark:


These cakes were no more than an inch and a half high! I got angry and went on a Google and cookbook deep dive to see why my cakes aren't behaving. I found lots of information about tapping the pans on the counter (did that), baking at a lower heat for a longer time (might try that next time but the cakes were honestly baked perfectly), adding a metal nail in the center of the cake to distribute the heat better (seems dangerous), and a host of other seemingly ridiculous suggestions. I decided to just blame my oven and go about my business. 

I sulkily cleaned up my kitchen and pondered what to do with my cake. I clearly couldn't make a hot tub cake out of that. I really didn't feel like making another cake that day and redoing it. The spa cake was just going to have to wait for another day. But in the meantime, I might as well whip up some buttercream and invite people over to eat cake! 

So I started gathering my ingredients for my buttercream and that's when I noticed my baking powder. My evil, evil SUPER EXPIRED baking powder. It expired in 2012. I don't even know where this baking powder came from. In 2012, it should've been Big Y brand and it wasn't even that. I'm suspecting it somehow came from my grandmother's house. Regardless, baking powder is kind of that thing that makes cakes fluffy. Expired baking powder will not do that in the least. Mystery solved, I guess. (Though I'm not ruling out oven temperature as a contributing factor.) 

Ok, with that sorted out, I went back to the buttercream. I went with the chocolate buttercream in America's Test Kitchen because, again, yummy. This was very uneventful and makes a really nice buttercream. Now I've got about a half hour to frost this sucker and decorate it and oh, did I mention that now I'm marinating steaks because I've invited people over? Never a dull moment. 

First I assembled the cake. This was easier than normal because there's no need to level out a completely and utterly flat cake. Then I frosted the entire thing and that looked fine. But I had leftover buttercream! I can't leave leftover delicious buttercream! I decided to pipe a bottom border because, why not? STILL leftover buttercream! What to do??? 

Just keep piping. 

I started making some sort of strange zigzag pattern on the side of the cake. I was running out of time and wanted to clean up and I didn't care too much about the aesthetics at that moment. It didn't look bad. Until I ran out of buttercream. Because of course I did. I cannot for the life of me gauge how far buttercream will get me. I'm the same way with knitting and guessing how far my yarn will get me. So now I have people coming over and piping around 2/3 of the sides of my cake. I certainly wasn't about to make more buttercream. So what did I do? 

I got creative. Uh oh. I dug in my pantry for anything resembling cake decorations. Random sprinkles that I bought to decorate cake pops? Yup, looks like a cake decoration to me now. I had some nice pastel round confetti sprinkles that I tossed into the gap in the cake. Literally tossed. Because when I tried to press them in, my hands and the sprinkles got covered in buttercream and I'm not nearly OCD enough to do something like use tweezers to decorate a cake. Whatever, guys, I was over it at this point. 


On the bright side, the cake tasted really good. It was a little bit dense (obviously) but the flavor was great. The pictures don't show it well but you could even see the marbling in the cake a bit. When all was said and done, not my finest hour as a baker. And now I have a bunch of yellow modeling chocolate and Kit Kats sitting around useless. Maybe I need to go back to cupcakes for a bit. And definitely need to check the expiration dates on all my ingredients! Sheesh.

Thursday, October 11, 2018

Because "Retirement" Has Too Many Letters!

This a super late baking report but I just have to tell you all about this one...

Get ready, because this was an advanced cake-building adventure. My mom has retired after a long and illustrious career and what better way to celebrate than with a big party, right? In planning the party, originally I was going to buy a cake. But then I thought to myself, "Why would I pay for a cake when I can just make one myself?" Seems absurd to pay for a cake! Surely I can make just as good a cake as any bakery who would inevitably misspell my mom's name. So I started planning my cake-building endeavor. Step 1: Make cake. Step 2: Make buttercream. Step 3: Build cake. Step 4: Frost and decorate cake. Easy peasy!

Sure.

Let's start with the cake. I wanted to make the cakes a bit in advance so that I wouldn't have to be spending an entire day and night making this cake. A bit of Google research informed me that cakes can in fact be made several days or even weeks in advance if they're frozen. Moreover, frozen cakes actually result in a moister cake. Interesting theory. Willing to put it to the test. So I turned to the good ol' America's Test Kitchen for their chocolate cake recipe. I briefly thought about using box mix but a) I wanted the cake to be more special than that and b) I didn't have any. Conveniently enough, I had all of the ingredients to make two 9x13 cakes. My vision was basically a sheet cake structure with some nice decorating. A simple two-layer cake seemed like plenty to feed the party masses. One problem: I only have one 9x13 pan. Of course. But it's fine, it just meant a long day of cake baking.

There's nothing too interesting about the recipe except that it includes sour cream and cocoa melted together with bittersweet chocolate. I'm convinced that's what makes it so good. I also didn't even  use my KitchenAid for this one. The recipe recommended a bowl and whisk. This surprised me because hours of watching Nailed It! have told me that I need to use a good mixer to get light and fluffy cake but ya know what? America's Test Kitchen has never once steered me wrong.

You know what just occurred to me? I could have just made a double batch of the batter and then only filled the pan with half the batter and covered the rest. Why didn't I do that? Why did I spend roughly 4 hours making two identical batches of cake? Seriously, weeks later and this idea JUST occurred to me.

Moving on.

I mixed up the batter (the first time) and filled my very carefully greased pan. America's Test Kitchen didn't specify how to grease it so I used Crisco. Nailed It! recommends butter. I figure Crisco is close enough. So I baked the cake perfectly and then had to wait for the cake to cool for 2 hours before removing it from the pan. Waiting. Waiting. Might as well make the second batch of batter while I wait. Waiting. Waiting.

Finally after two long hours, I could flip the cake onto the cooling rack. I'm always impressed by how cavalierly people on baking shows toss their cakes around. I'm always terrified of them breaking. I very carefully flipped my cake out onto the cooling rack and only slightly lost two of the corners to sticking. Ooops. I really greased the corners well so I'm not sure what happened. However, it is a super duper old pan. Look back to when I started this blog. It's my ONLY 9x13 pan. Anyway, the broken pieces allowed me to taste the cake and YUM. So good. So I filled the pan for the second time and took extra care re-greasing the corners and let the second cake bake. And then let it cool for 2 more hours. Waiting. Waiting.

Finally, I could flip the second cake out of the pan and once again, the same two corners stuck. Time for a new pan for sure. But overall the cakes were pretty even and it seemed like a success. Just needed to wrap them in plastic and put them in the freezer. I laid the plastic wrap out on the counter and flipped the first cake from the drying rack onto the plastic. Not bad. I got a nice tight wrap on the cake and put it in the freezer. It did seem like I needed to handle the cake very carefully though. Did the same thing with the second cake annnnnnnd...crack. Entire cake split right up the middle. Devastation. How do people toss cakes around and not have them break?? Are they making super dense construction cakes? What's the story here? I certainly wasn't going to make another cake so I just wrapped it up tight and told myself that I'd stick it back together with buttercream.

Whew. Now I can take a break for a few days.

The next step required a change of location. Better to decorate a cake where you'll actually be serving it so I headed to the shore armed with two frozen cakes, ingredients for buttercream, and everything I could possibly need for decorating this cake. Oh, and cake boards because I thought I'd get fancy and not just serve it on a sheet pan.

I decided to go with a simple vanilla buttercream but used the recipe specified by America's Test Kitchen. This recipe is terrific but is a pain in the butt to make. It involves whipping egg whites, simmering sugar and ever so carefully pouring the sugar into the egg whites extremely slowly while the mixer is going and "being sure not to get any on the sides of the bowl and beater." Sure. I actually managed to not make too much of a mess with my pouring and while I was doing this, my mom was carefully cutting the pound of butter into small pieces. Yes, a pound. I had to mix until the bowl was barely warm which took around ten minutes and then had to beat in the butter one piece at a time. Needless to say, this buttercream took forever to make. I used the time to unwrap my cakes and level them. I haven't been super pleased with the way my cakes have been puffing up lately and I think that's down to my oven temperature but no big deal since I was just going to cut the cakes to the size I wanted anyway. Buttercream ready to go, it was time to start frosting!

I leveled out the bottom cake and put it on the cakeboard and flopped some frosting on top. And immediately figured out that a) two of these cakes would be extremely massive and b) I was going to almost surely run out of buttercream. I probably could have made one 9x13 cake and cut it in half longways. That's how fat these cakes were. So I was trying to walk the delicate tightrope of having a thick layer of frosting in the middle so it wouldn't just be huge bites of cake and not running out of frosting. I used my best judgment and then flopped the second cake on top. Seriously big cake. I leveled out the sides, somehow did a poor job of doing so, and ended up with a bit of a trapezoid cake. Oh well. I eeked out every last ounce of frosting to cover the cake. I managed to but it wasn't a very neat job at all. And I had run out of buttercream for decorating. Damn.

Guess that means I have to make a second batch of buttercream! I didn't feel up to spending another hour making buttercream so I pulled up some random recipe online and made a simpler buttercream. It tasted decent but not nearly as good. Since this buttercream would be used for decorating, I consulted the guest of honor on what color she would like. I had my amazing color mixer kit so could make any color in the world. She said orange. "Orange??" "Yeah, orange would be fun!" Ok. Not exactly what I would have picked but what the retiree wants, the retiree gets. Plus it was getting late and I was getting a little punchy. A note on colors: since we did all of the frosting the day before the party, the buttercream yellowed a bit overnight (as predicted by America's Test Kitchen) so the orange was a nice complement to the yellowed buttercream. Personally, I didn't find it the most appetizing combination of colors though so in the future, I think I'll definitely color the buttercream.

Anywho, my concept for this cake was to represent all of my mom's different jobs over her career. A bubbling beaker for her lab job, a bottle of pills for one of her companies, and two of the products from her other two companies for a small bit of a 3D element. I also fully intended to write "Happy Retirement!" However, at that point, my brain wasn't up to that much piping or for correctly spelling "retirement" so instead I landed on "Yay Jean!" I apologize for nothing. I was also very anxious about piping the decorations on and wasn't pleased with how one came out so I had to scrape it off and try again but eventually it got done. And now I had a ton of orange buttercream left over because I had only piped tiny decorations. So I decided to use the rest of the buttercream to line the top and bottom of the cake. I was looking for a swirly rose type piping tip and I mostly achieved that. I'm also very proud of the evenness and uniformity of my piping. Only problem: I once again ran out of buttercream! I am apparently a very poor judge of buttercream quantities. I managed to juuuuuust eek out enough to finish the decorations. Way more stressful than it needed to be. Plus my cakeboard really backfired on me because it left stains anywhere I dripped buttercream so I didn't get the nice, clean look that I was going for. I've since seen a trick where you put parchment paper strips under the edges of the cake to avoid that. I'll have to try that next time.

At the end of the day, I was pretty pleased with how the cake turned out and people were generally impressed. Decorating skills need some work but I'll get there someday. Maybe.


Oh, by the way, the cake tasted AMAZING. It was one of the best cakes I've ever made. Super moist. Great pairing with the buttercream. It could've been a bit thinner but overall, flawless cake recipe as far as flavor goes. A store-bought cake wouldn't have tasted this good! Although, maybe a store could've spelled "retirement"...

Tuesday, October 9, 2018

Little Puffs of Happiness

Just a quick little update to brighten your day! Some epic baking tales are in my backlog but I thought I'd just give you all a little taste of what I've been up to lately. After my super awesome trip to South Africa, I've decided that the lack of a proper afternoon tea is everything that's wrong with our country. (Not really, there's a whole host of other things, but afternoon tea is the one I can tackle today.) To that end, I've decided to institute tea time in my day at approximately 3:00. Naturally, if I'm going to have tea, I'm going to need some afternoon snacks to go with my tea! I wanted something that stored easily and something more on the savory side so I opted for Cheese Gougeres.

Basically these are nice bite-size cheese puffs made from a pate a choux (forgive my French, I'm way too lazy to put in appropriate symbols). What's a pate a choux, you ask? I barely know myself. It's the pastry that you use for cream puffs and eclairs and such. Which means I've made it before. With mixed success. However, I've been binge watching the Great British Baking Show on Netflix so I've watched it get made a bunch of times and now have a much better idea of what to do. Maybe. Ok, not really. But off we go anyway!

Step 1: preheat oven. Check. I'm doing so well already. Next I had to combine butter, water, and salt into a 2-4 qt saucepan. I literally have 2, 3, and 4 qt saucepans and stood motionless in my kitchen for a solid 5 minutes debating which one to use. I opted for the 3 qt because I was only combining a cup of water and a stick of butter and then adding a cup of flour to it later. Plus I never get to use my 3 qt pan so this was a new and exciting adventure. I brought it up to a boil as directed and then took it off the heat to IMMEDIATELY! add a cup of flour and stir vigorously with a wooden spoon until it resembled mashed potatoes. Ooof, need to work on my arm muscles. After a couple minutes, it actually did start to resemble mashed potatoes! I swear it even started to smell like mashed potatoes. Then I had to return it to medium-low heat and stir for 3-5 minutes until the dough "smells nutty, glistens, and dries out enough to hold up a spoon". Disaster.

At first it seemed like the dough would never dry out and I got worried that the heat was too low. Then I worried that I was stirring too fast (or maybe too slow?) and was experimenting with different speeds. And actually, at about 5 minutes, the dough was glistening and smelled nutty and looked drier. But it couldn't support a spoon. That said, I suspect that in the 3 qt pan, it never would have supported a spoon because the base was too wide. So I kept stirring a little over the 5 minutes and I swear, at 6 minutes precisely, the dough just died. It somehow seemed to be getting worse! It looked to me like all of the butter was now seeping out of the dough from overmixing. I had no idea if it could be saved. I took it off the heat, I tried stirring it slowly to try to reincorporate the butter, I prayed to the baking gods, I stared at my pot...and I threw out the dough. Failure.

Don't get despondent yet! I'm determined to succeed!

So I just started again. This time, in the 2 qt pan and with a shorter wooden spoon so I could get better leverage. And with timers so I didn't go one second over that 5 minute mark. And ya know what? It worked! I'm really proud of myself for trying again. I moved the dough to the mixer where I was supposed to mix for about 1 minute until the dough stopped steaming. After a minute the dough was still steaming and I started panicking again. But the next step was adding eggs and I really didn't want scrambled eggs. I let it mix a tiny bit longer and then added the eggs one at a time as directed. The recipe was a little bit weird in that it said some days I might need 3 eggs and some days I might need 4 and to check it by seeing if the dough makes a V when I lift it with a spatula. Ooooook. I did get a little worried after the second egg because I felt like the dough was doing the opposite of incorporating the egg and was splitting apart instead. But I upped the speed just a bit and it all came back together. By the way, I did need all 4 eggs.

Next I had to mix in the cheese. I decided to make half with Gruyere and half with Parmesan. I eyeballed dividing up the dough and mixed in the Gruyere first. I was pretty amazed how well the shredded Gruyere incorporated into the dough. It was a super smooth dough. Finally, I had to scoop out 12 Gruyere balls from my dough. They seemed a little bit big and definitely sticky and I ended up with 15 instead of 12. I think in the future I'll make them smaller but I didn't want to work with 3 baking pans this time. Then I mixed up my Parmesan gougeres and got about 9 out of that. Again, bigger than I wanted but I couldn't stand the thought of 2 batches.

Apparently the key to baking these is a high heat initially then longer on a lower heat. I'm going to come out and say this now: I do not think my oven is baking at correct temperatures. I keep meaning to get an oven thermometer and check but I haven't gotten around to it. And with pastry, you really do want to be correct. So into the oven they went at 450 for 5 minutes. I'm not sure if this step was supposed to brown them or not but they didn't really get very brown. Then the directions said to reduce the heat to 350 and bake until puffed, deep golden brown, and dry to the touch. For some reason, I thought I had to take them out of the oven and wait for the oven to come down to 350 before continuing to bake them. I have no idea why I thought this. It's not like the recipe said to take them out. I've literally never done that before for anything I've ever baked. I can only claim temporary insanity that lasted approximately 3 minutes before I yelled in my kitchen "WHAT AM I DOING?!?!" and threw them back in the oven. So umm, that happened.

At the end of the day, they needed a bit longer in the oven and didn't get quite as deep golden brown as I would have liked but they were done and they were delicious. Little puffy heavenly bites.


The more neatly rounded ones are the Parmesan and the messy ones are the Gruyere but I actually really like the nooks and crannies of the messy ones. Plus I think I like the taste of the Gruyere better.

Overall, definitely some user error in this recipe but live and learn and now I have a bunch of these in my fridge and freezer to enjoy with tea! Yum! I'll take any other suggestions people have for afternoon tea snacks by the way, and encourage you to institute your own personal afternoon tea time!